Introduction
This guide will walk you through the process of creating your first workflow on WorkflowDog. In the end, you’ll have a workflow that responds to a URL with a dynamically generated message. For more advanced tutorials, check out our YouTube channel.1. Login to WorkflowDog
I already have an account
If you already have an account, you can login here.I don’t have an account
Create an account here. You’ll need to log in with your Google account. When you create a new account, a project and workflow will automatically be created for you. You’ll be redirected directly into the workflow editor. You can proceed to #3 below.2. Create a workflow
Once logged in, navigate to the desired project, click on “Workflows” in the left sidebar, and click on “Create a Workflow”. Next, you’ll need to select a trigger. This is the event that will cause your workflow to run. A good one for testing is the URL trigger. We can make this workflow run by simply navigating to its URL.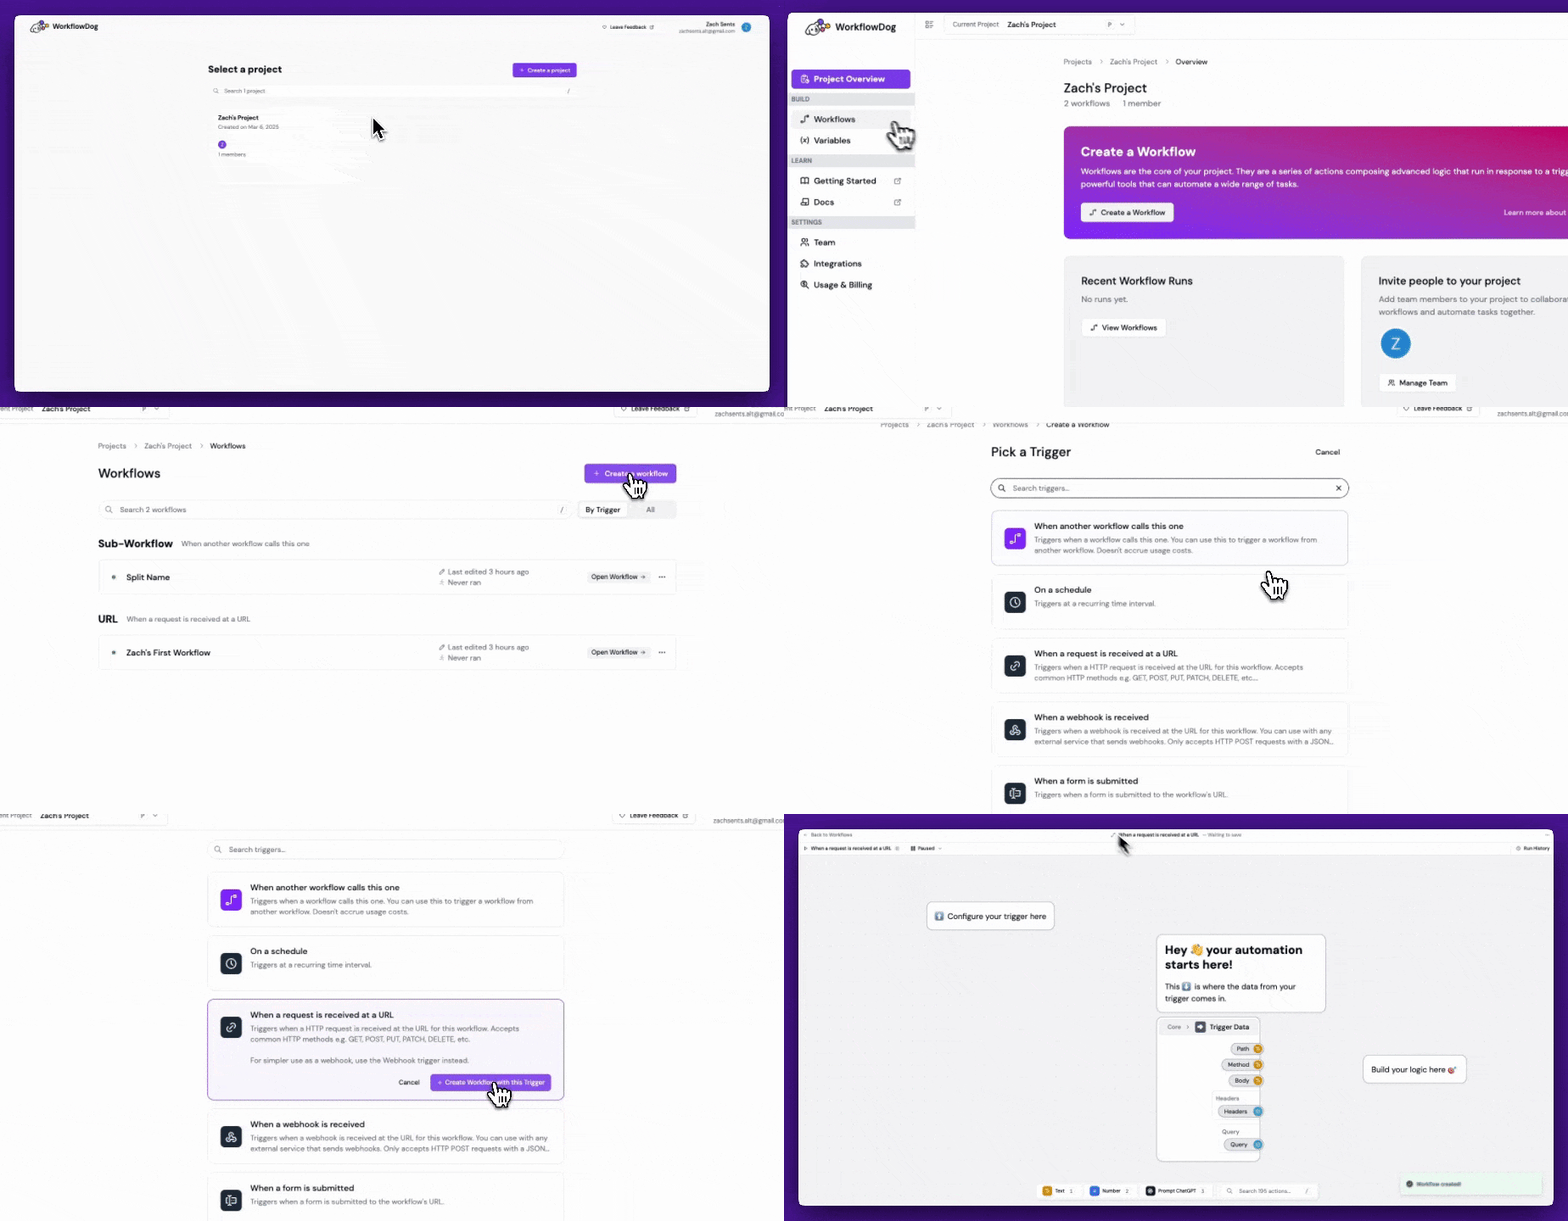
3. Add an action
You’ll see when the workflow was first created, there is a “Trigger Data” action already added. This action provides some relevant data about the triggering event. For the URL trigger, you’ll see the query parameters, the body (if any), the HTTP method, etc. Now, we need to add some more actions to make our workflow do something useful. To add an action, you can click into the search in the bottom toolbar, where it says “Search actions…”. There’s also a shortcut for this: /. Type “template” into the search and select the “Text > Template” action. This action allows you to dynamically generate text based on the data available to you.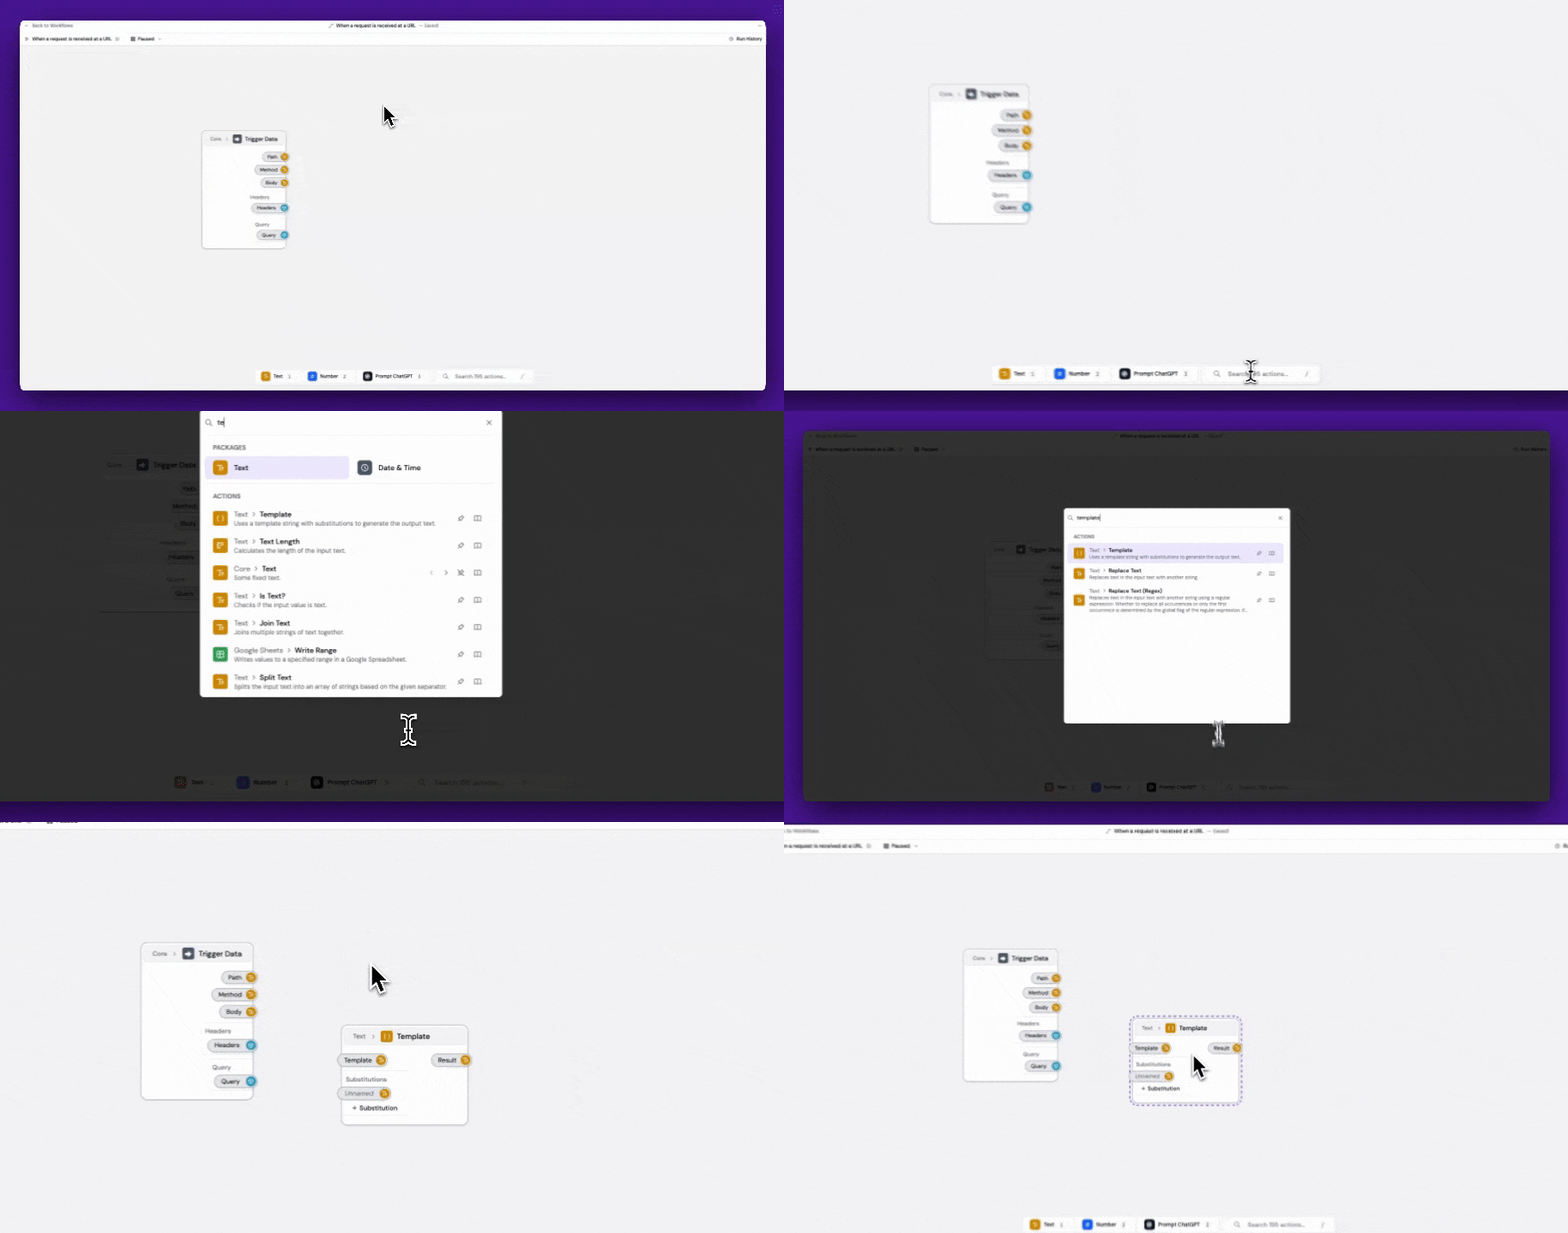
4. Configure the Template action
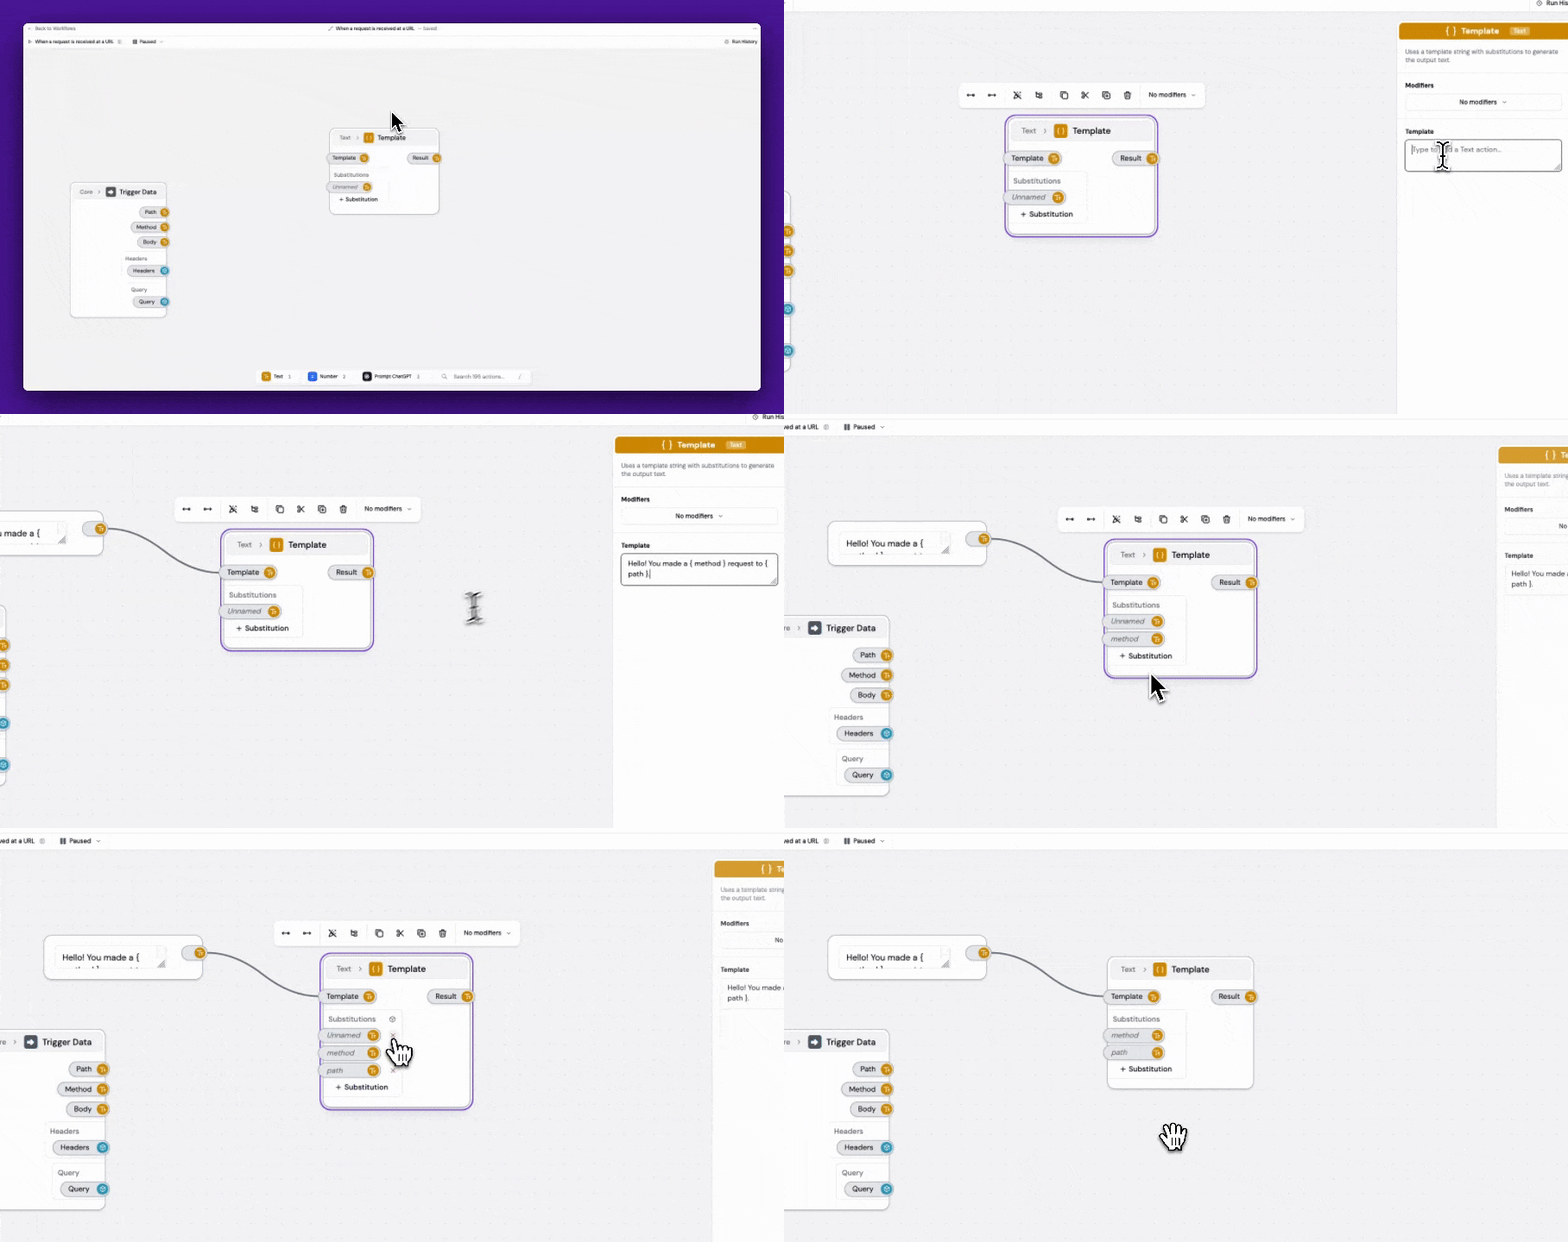
Click the Template action to select it. You’ll see the config panel appear on the right. In the text field labeled “Template”, type the following:{{ method }} and {{ path }} in the template text. Click on the “method” suggestion. Repeat this for the “path” substitution. Also, delete the extra unnamed substitution input.
5. Add the remaining logic
Find the “Method” output on the Trigger Data action. Click and drag it into the “method” substitution input on the Template action we just created. Do the same for the “Path” output and our “path” substitution. You’ll end up with 2 connections streaming from the Trigger Data action to the Template action. Hit / on your keyboard to open the action search again. Type “respond text” and select the “HTTP > Respond Text” action. Drag it to the right of the Template action to keep the canvas organized. The Respond Text action will respond to the triggering request with the message we just created. In our case, the triggering request is going to be you navigating to the URL in your browser. Finally, create a connection between the Template’s “Result” output and the Respond Text action’s “Body” input.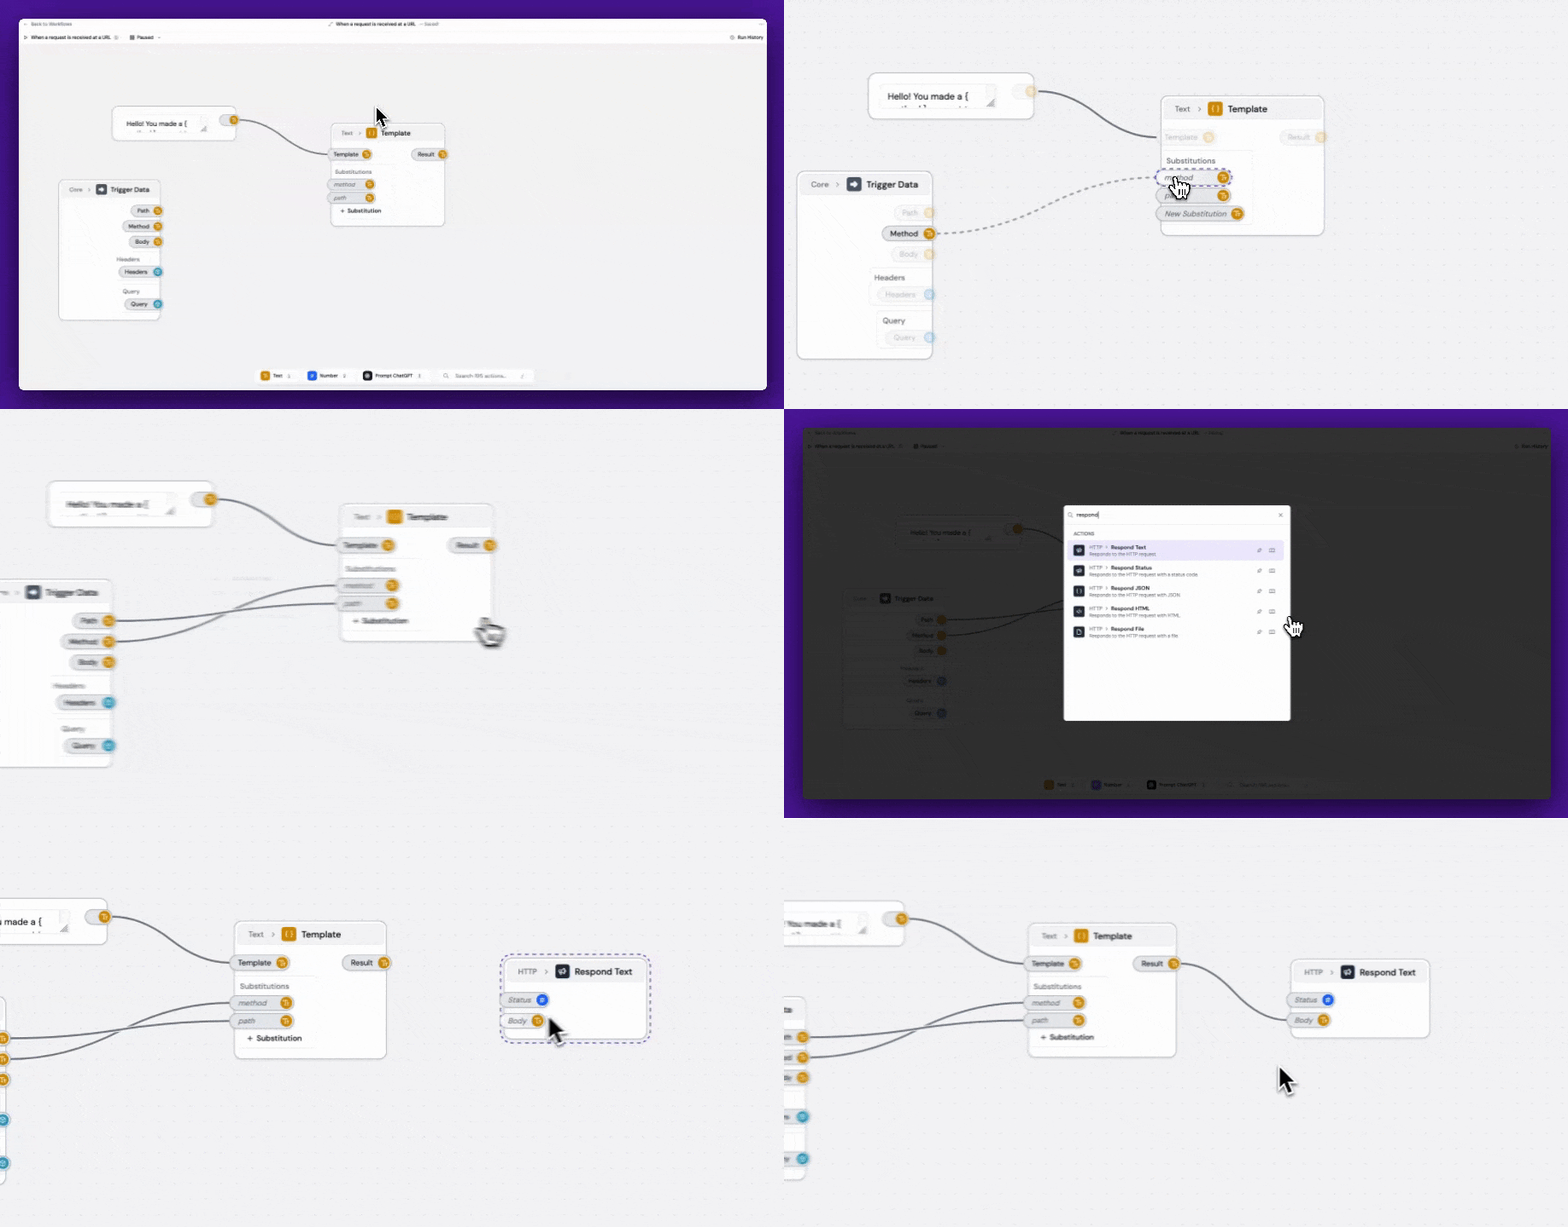
6. Enable the workflow
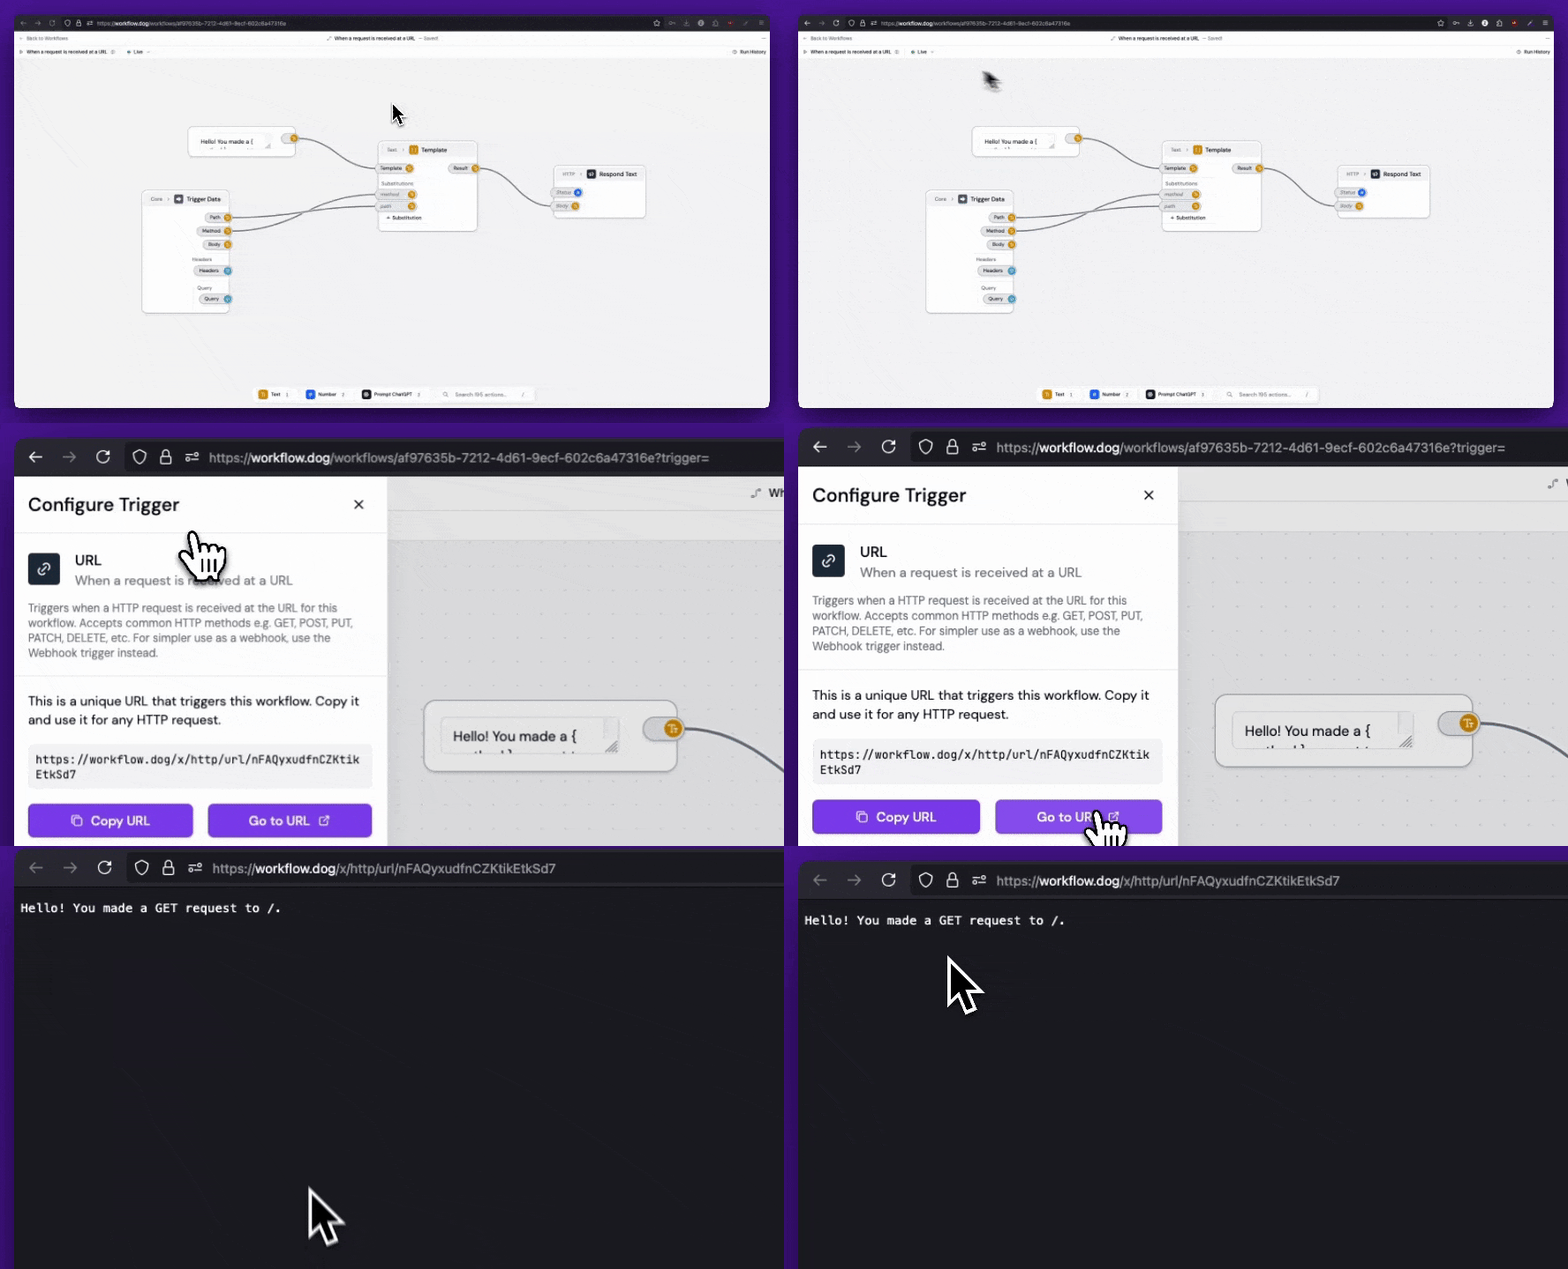
At the top left of the editor, you’ll see the workflow is currently paused. Click where it says “Paused” and select “Enable Workflow”.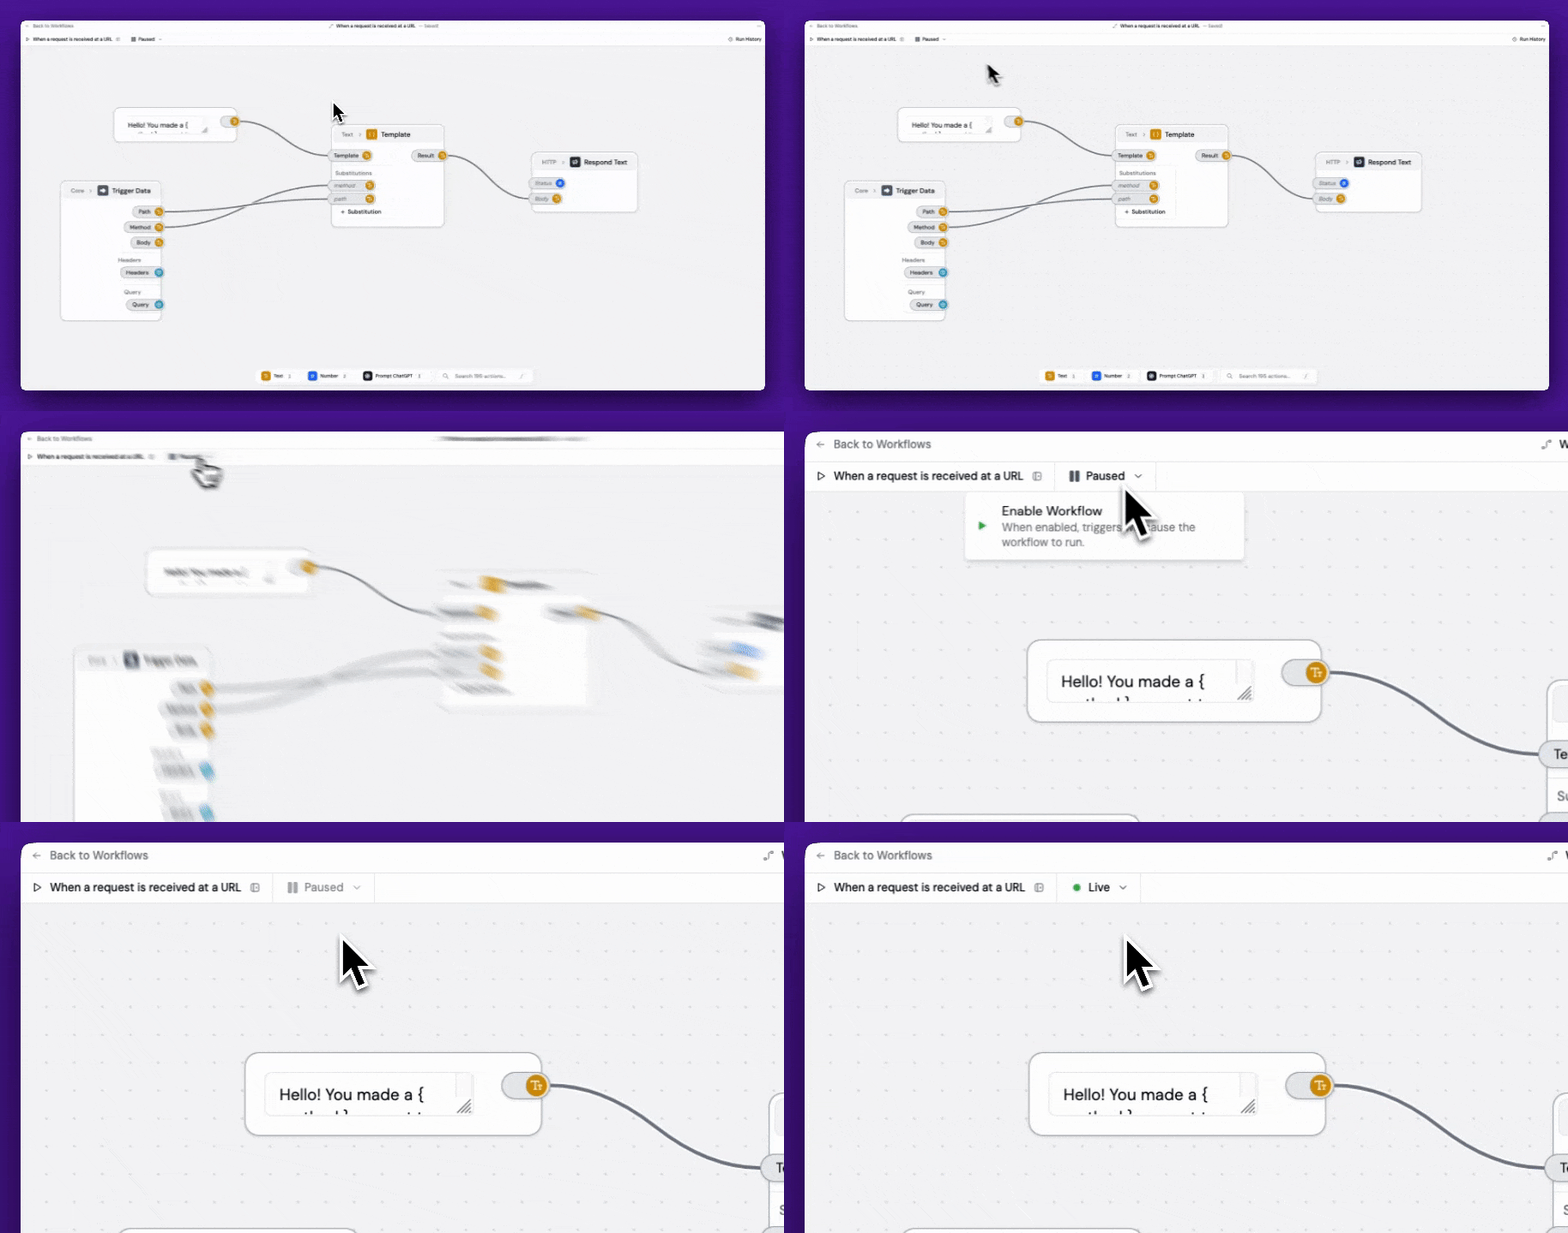
7. Test the workflow
On the top left of the editor, click where it says “When a request is received at a URL”. This opens the trigger config panel. Here you’ll see your workflow’s URL. You can use this anywhere that accepts a URL: a browser, a website form action, a webhook, etc. The possibilities are endless! We’re going to test by navigating to the URL in our browser. Click the “Go to URL” button. You’ll see the messageHello! You made a GET request to /.
